Compute
Compute 부트볼륨 사이즈 업 이후 재설정
Table of Contents
1.Compute 부트볼륨 변경하는 방법
compute 생성 이후 필요에 따라서 추가적인 block volume을 추가하기도 하지만 원천적인 boot volume의 사이즈를 변경해야하는 경우, 아래와 같이 진행하면 됩니다.
부트볼륨의 경우, 한 번 사이즈 업 된 이후에는 다시 사이즈 다운이 안됩니다!
 원하는 사이즈로 변경합니다.
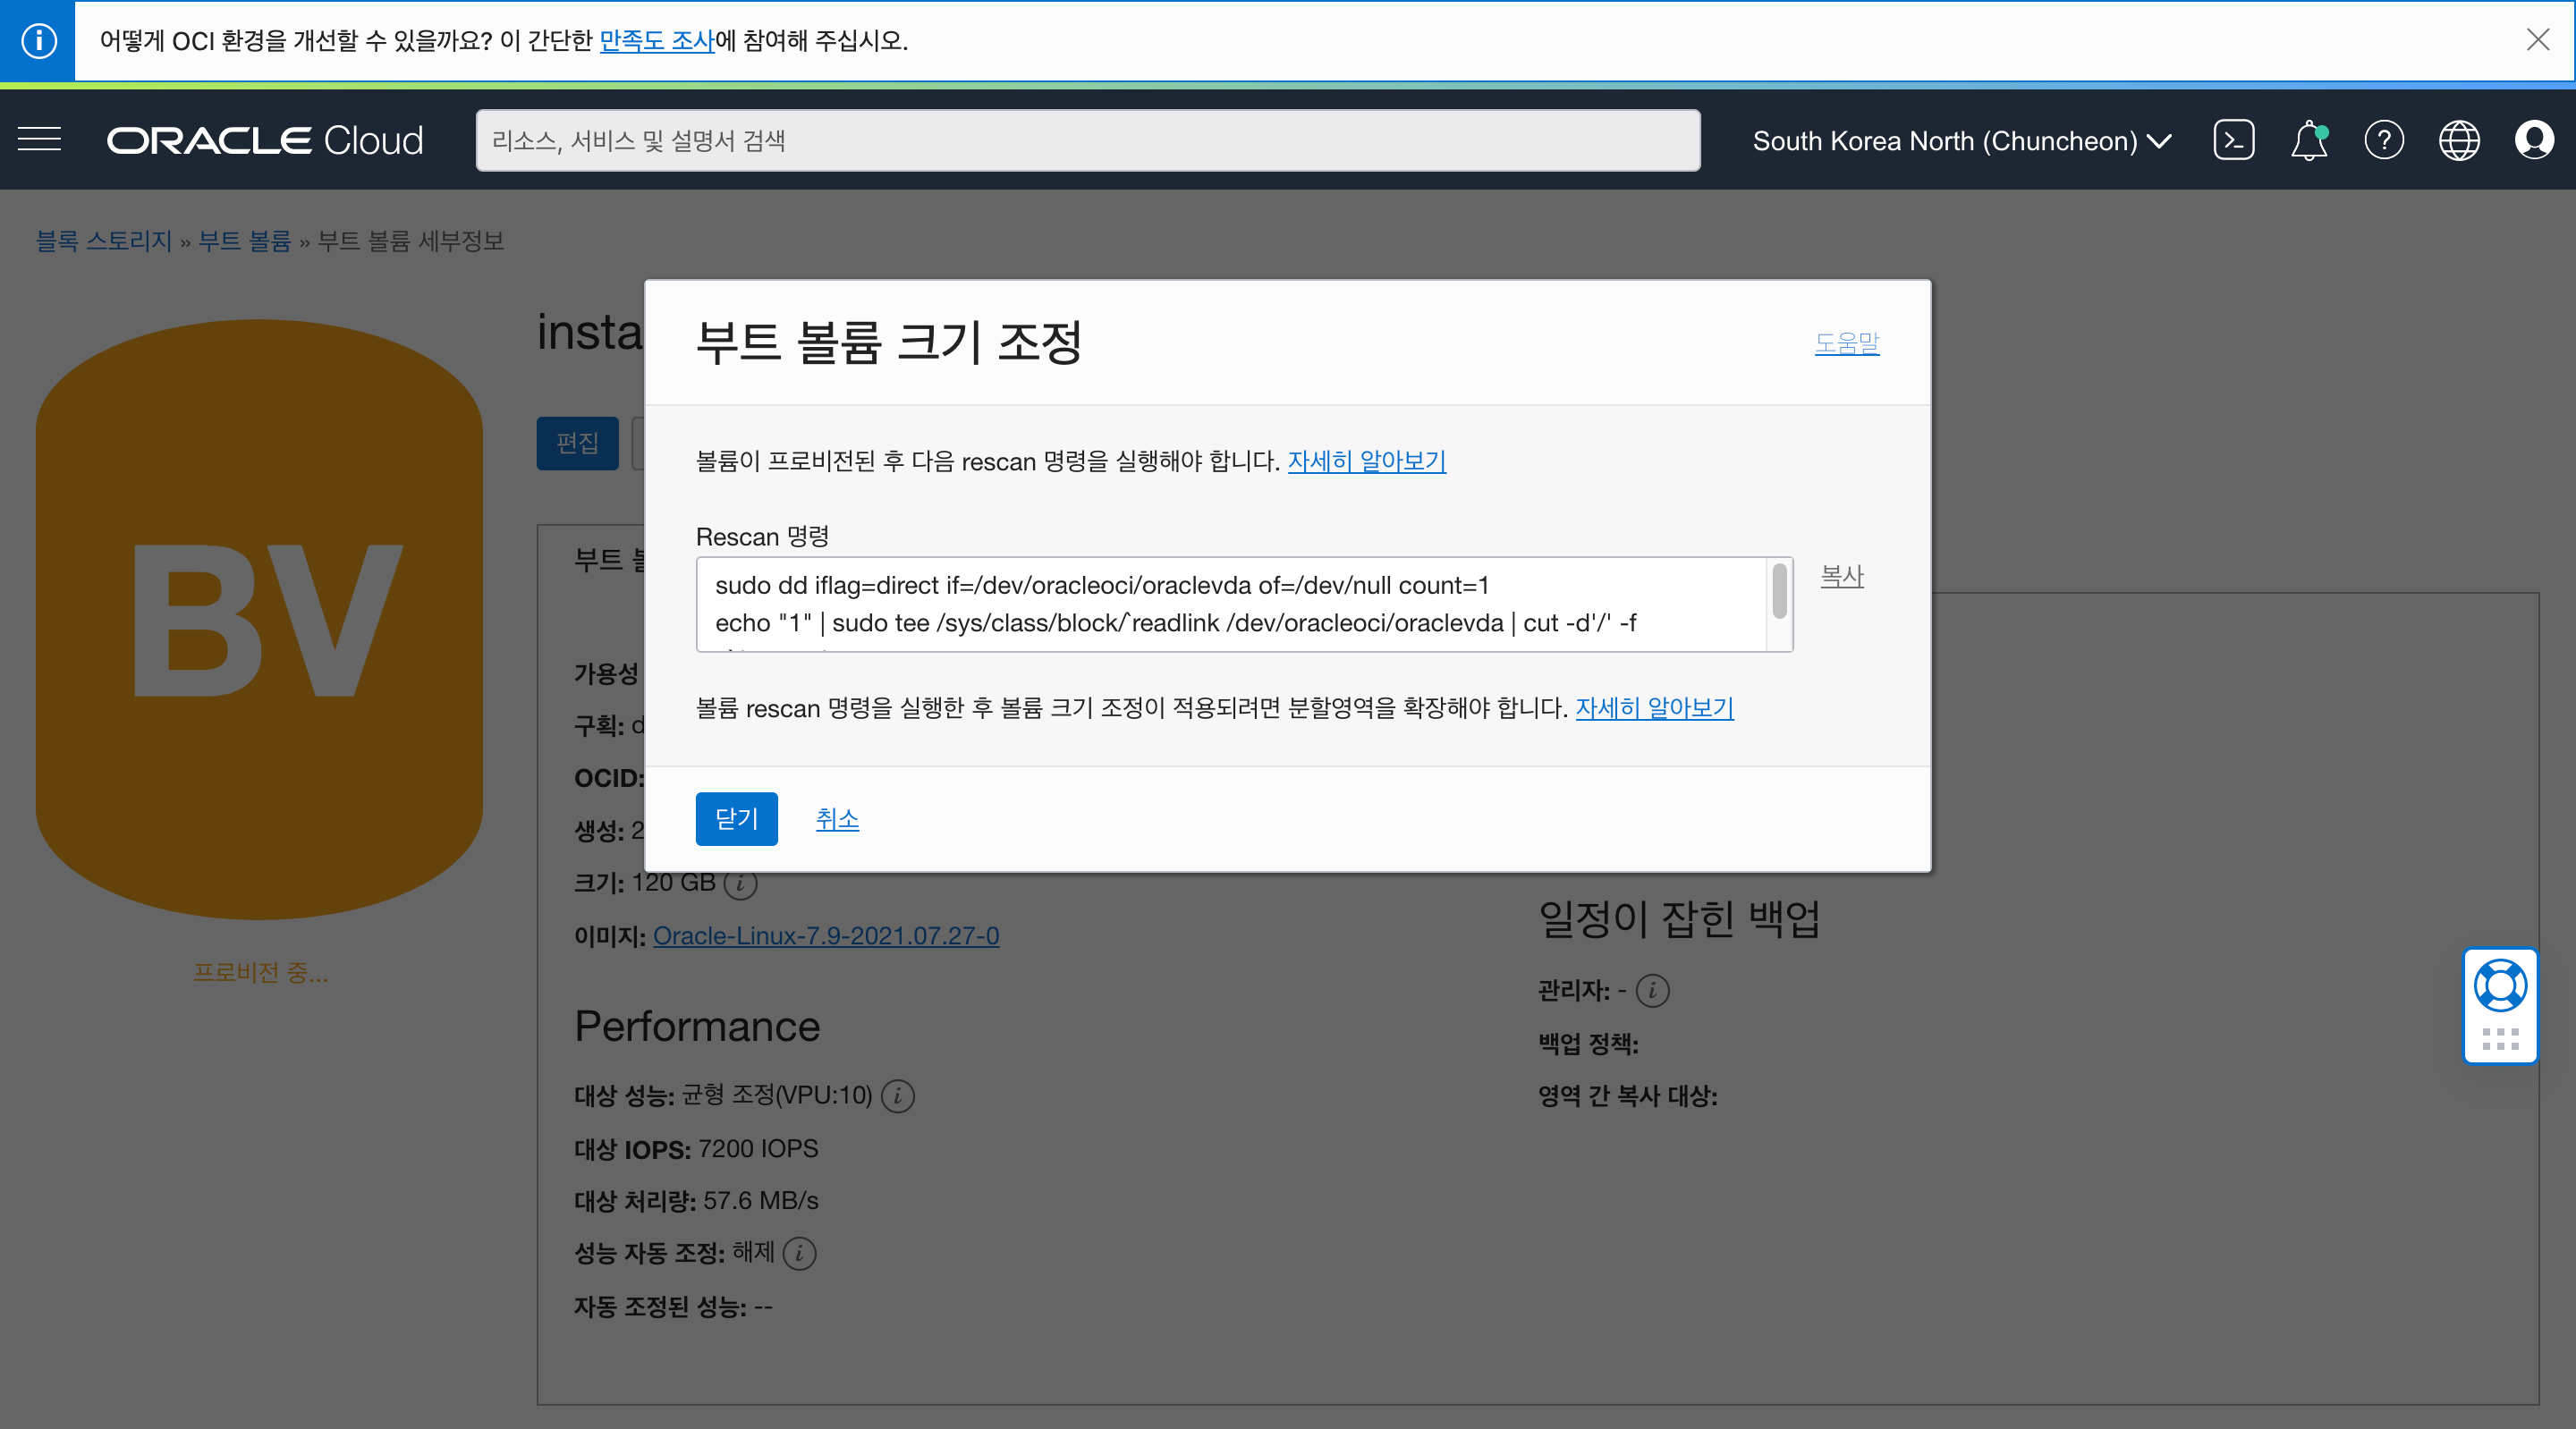
변경 이후 필요한 위 팝업의 명령어를 OS 상에서 실행하기 위해서 copy해 줍니다.
2.사이즈 변경 이후 OS상에서 실행해야하는 명령어
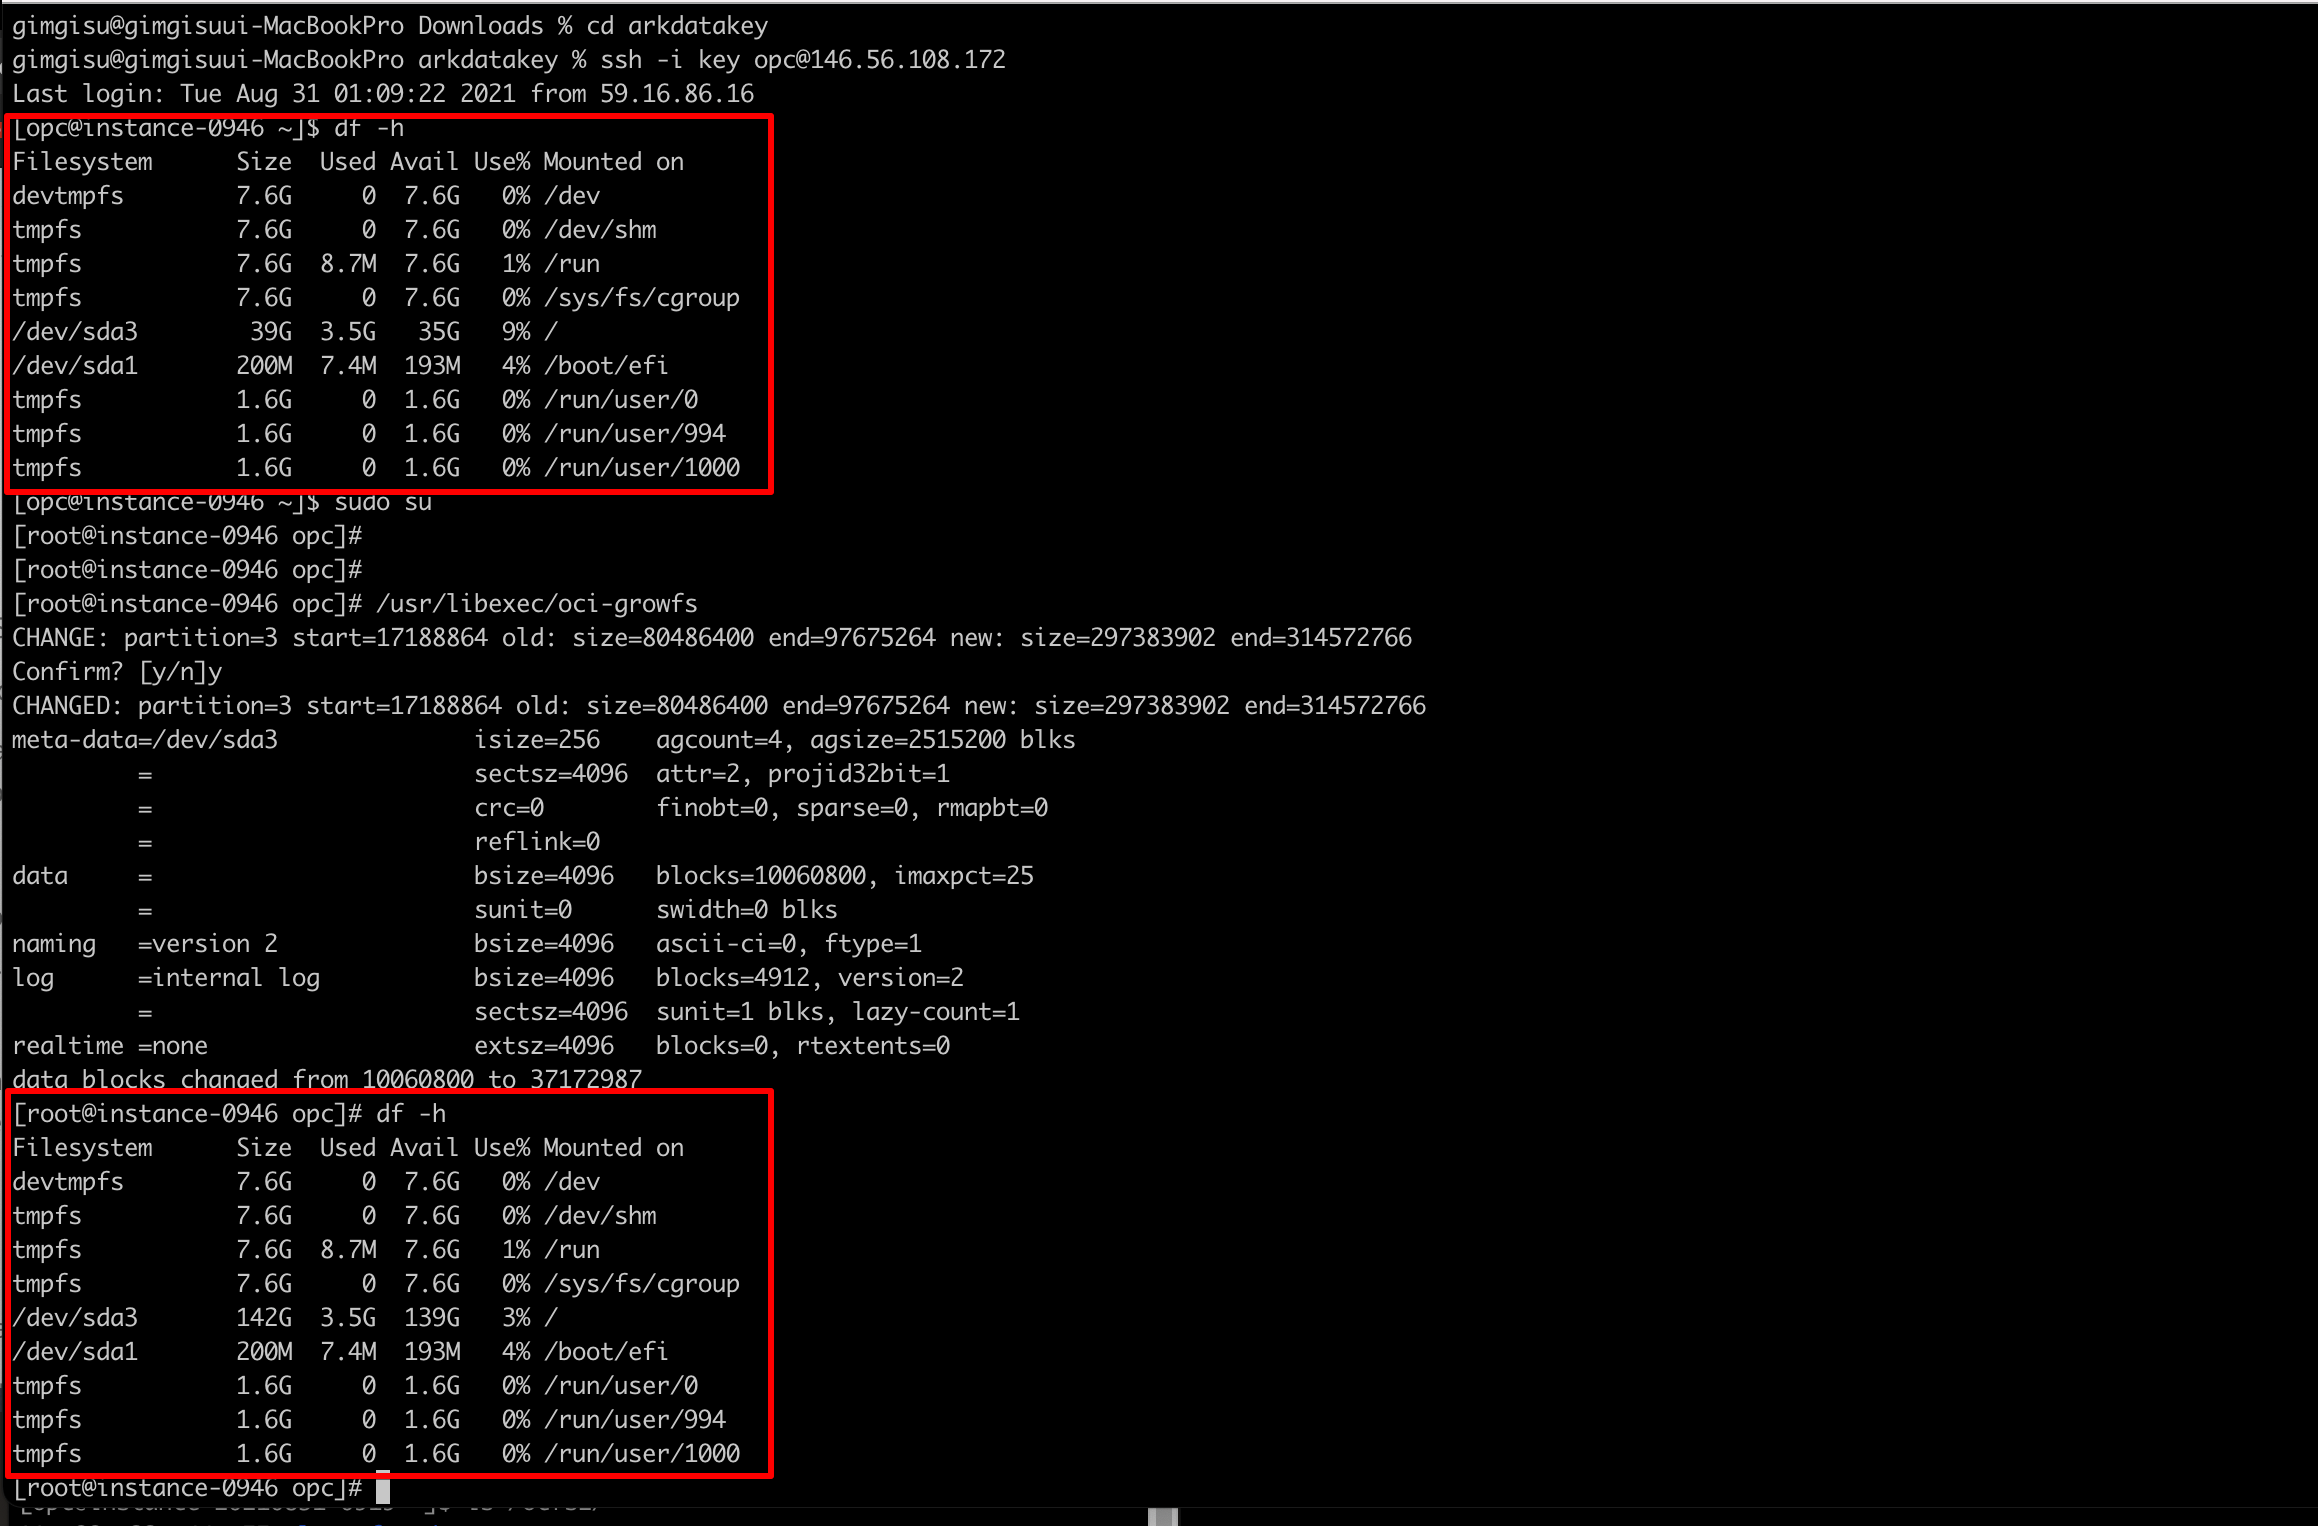
터미널 접속 이후 아래 명령어를 실행합니다.
- 팝업에서 copy한 명령어 (예제이며, 실제 팝업의 명령어를 실행해 주세요!)
sudo dd iflag=direct if=/dev/oracleoci/oraclevda of=/dev/null count=1 echo "1" | sudo tee /sys/class/block/`readlink /dev/oracleoci/oraclevda | cut -d'/' -f 2`/device/rescan - OCI상에서 실행되는 명령어
$ sudo /usr/libexec/oci-growfs [명령어]
CHANGE: disk=/dev/sda partition=3: start=17188864 old: size=80486399,end=97675263 new: size=192526302,end=209715166
Confirm? [y/n]: y
CHANGED: disk=/dev/sda partition=3: start=17188864 old: size=80486399,end=97675263 new: size=192526302,end=209715166
 meta-data=/dev/sda3              isize=256    agcount=4, agsize=2515200 blks
 =                       sectsz=4096  attr=2, projid32bit=1
 =                       crc=0        finobt=0 spinodes=0
 data     =                       bsize=4096   blocks=10060800, imaxpct=25
 =                       sunit=0      swidth=0 blks
 naming   =version 2              bsize=4096   ascii-ci=0 ftype=1
 log      =internal               bsize=4096   blocks=4912, version=2
 =                       sectsz=4096  sunit=1 blks, lazy-count=1
 realtime =none                   extsz=4096   blocks=0, rtextents=0
 data blocks changed from 10060800 to 24065787
INFRASTRUCTURE
oci compute